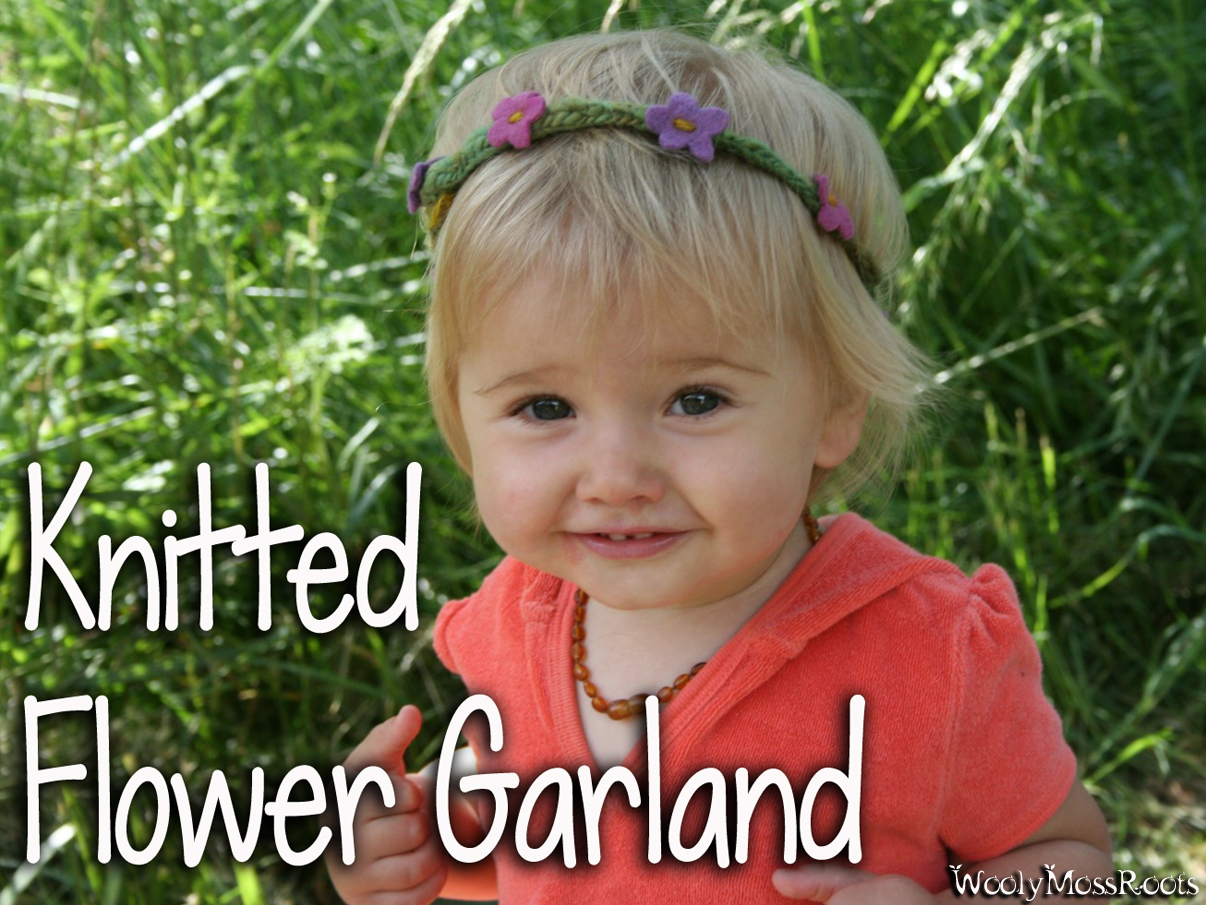
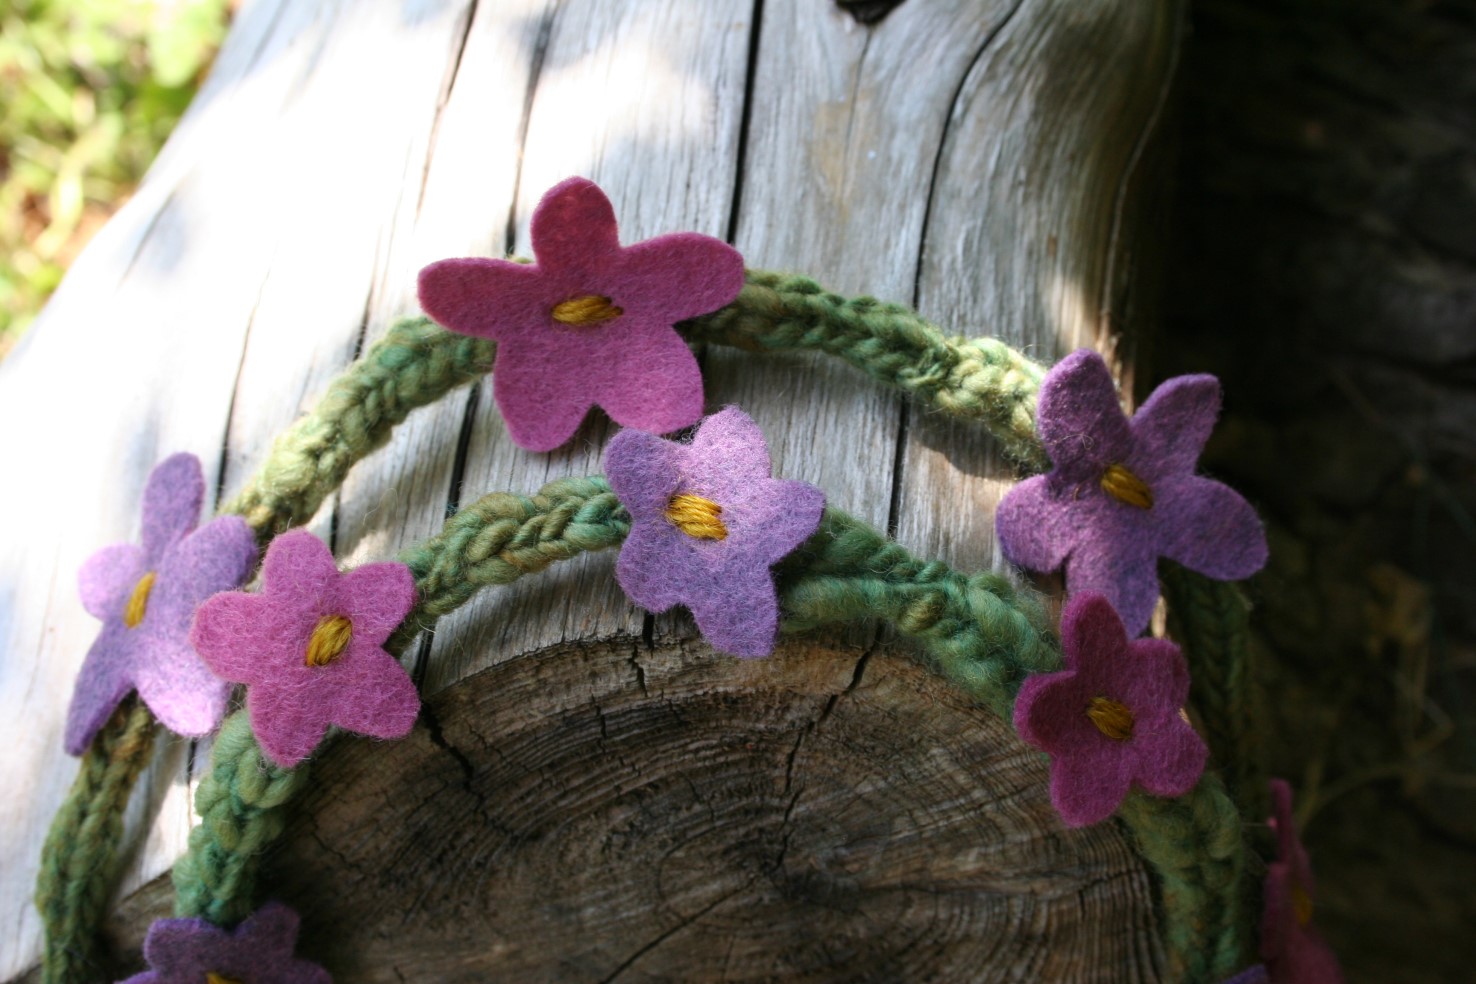
 Last year I made knitted flower garlands for our family to wear to the May Faire, a favorite springtime celebration that we go to every year. I thought it would be much easier for us to put wool garlands on that morning than to seek out fresh flowers. (You know how it is getting out the door in the mornings.) In the original post here, I shared how to make them. This year I created a few more garlands, a new one for Bracken and some for friends. Last year I made all the flowers in white, but this year when I cam across some beautiful colors of wool felt, I thought it would be fun to make the flowers in different colors. (I made Bracken one with blue flowers, but ended up making the flowers too big for his and would make them smaller if I were to make it again.) I chose some lovely shades of pink and purple for the others because I thought the colors would look perfect on our friend and her sweet girl. This year I decided to create an updated tutorial here with fresh pictures, including more of the process. So if you would like to make these knitted flower garlands, this post is for you!
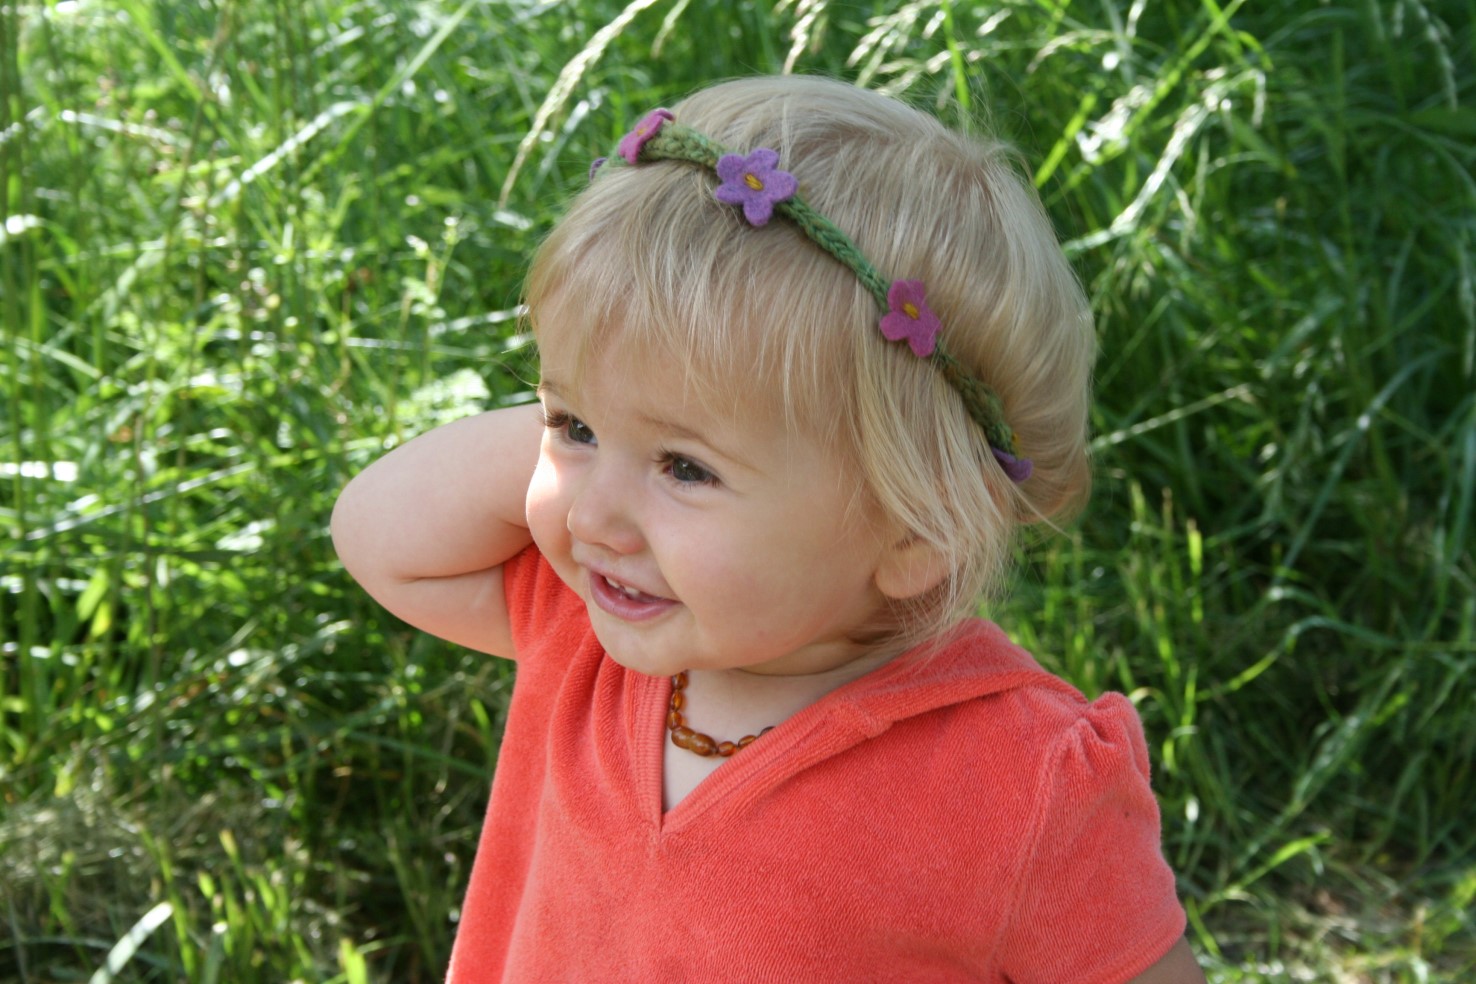
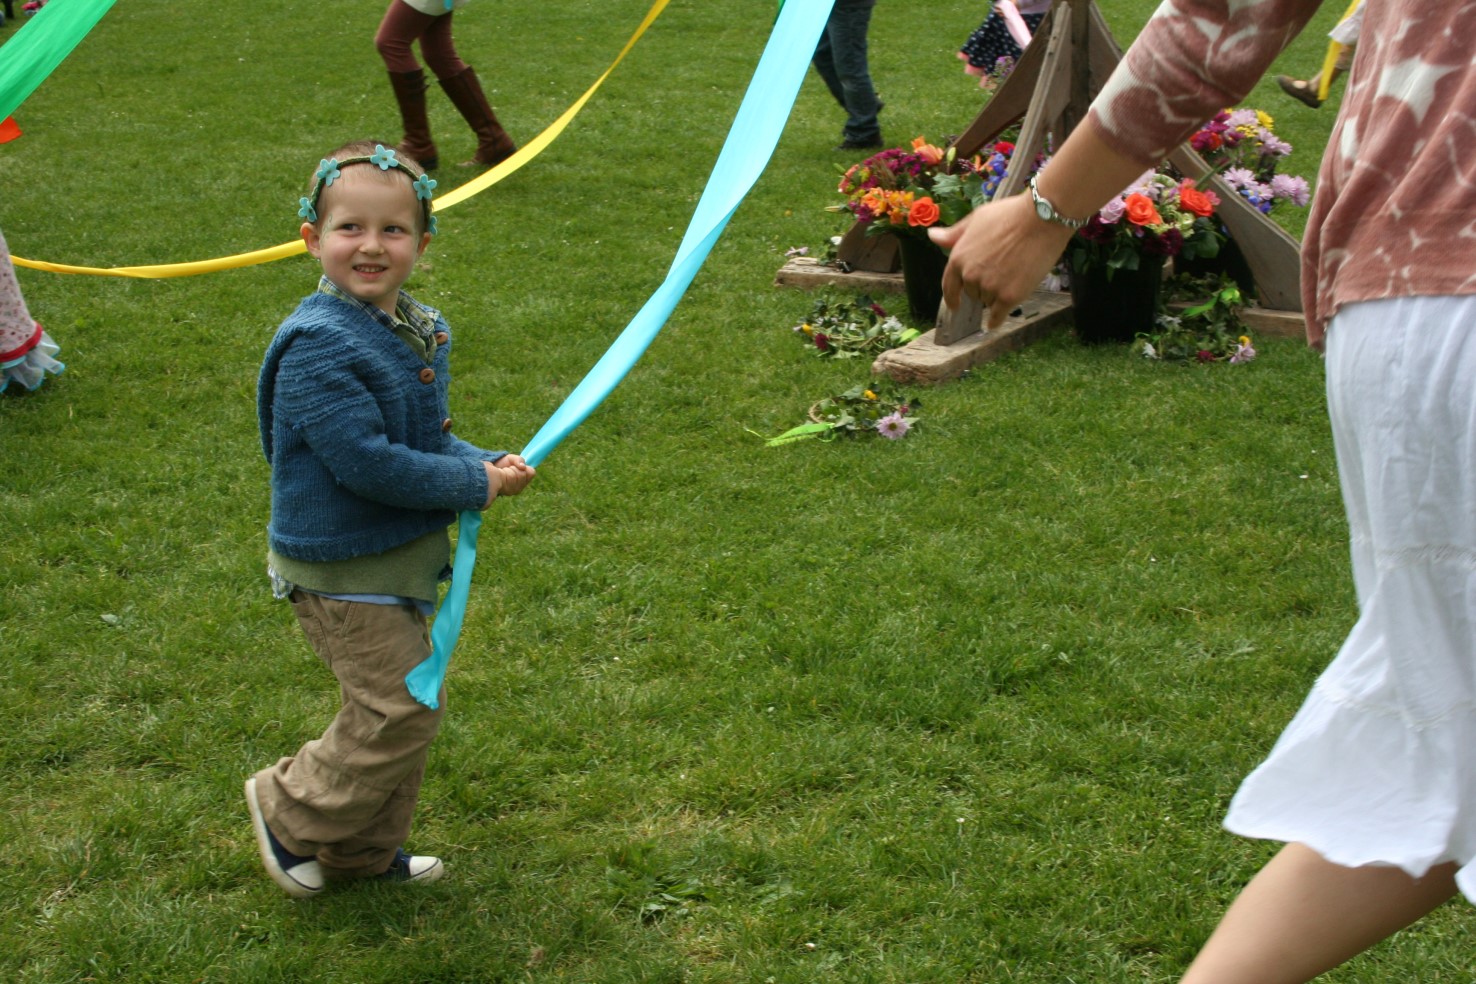
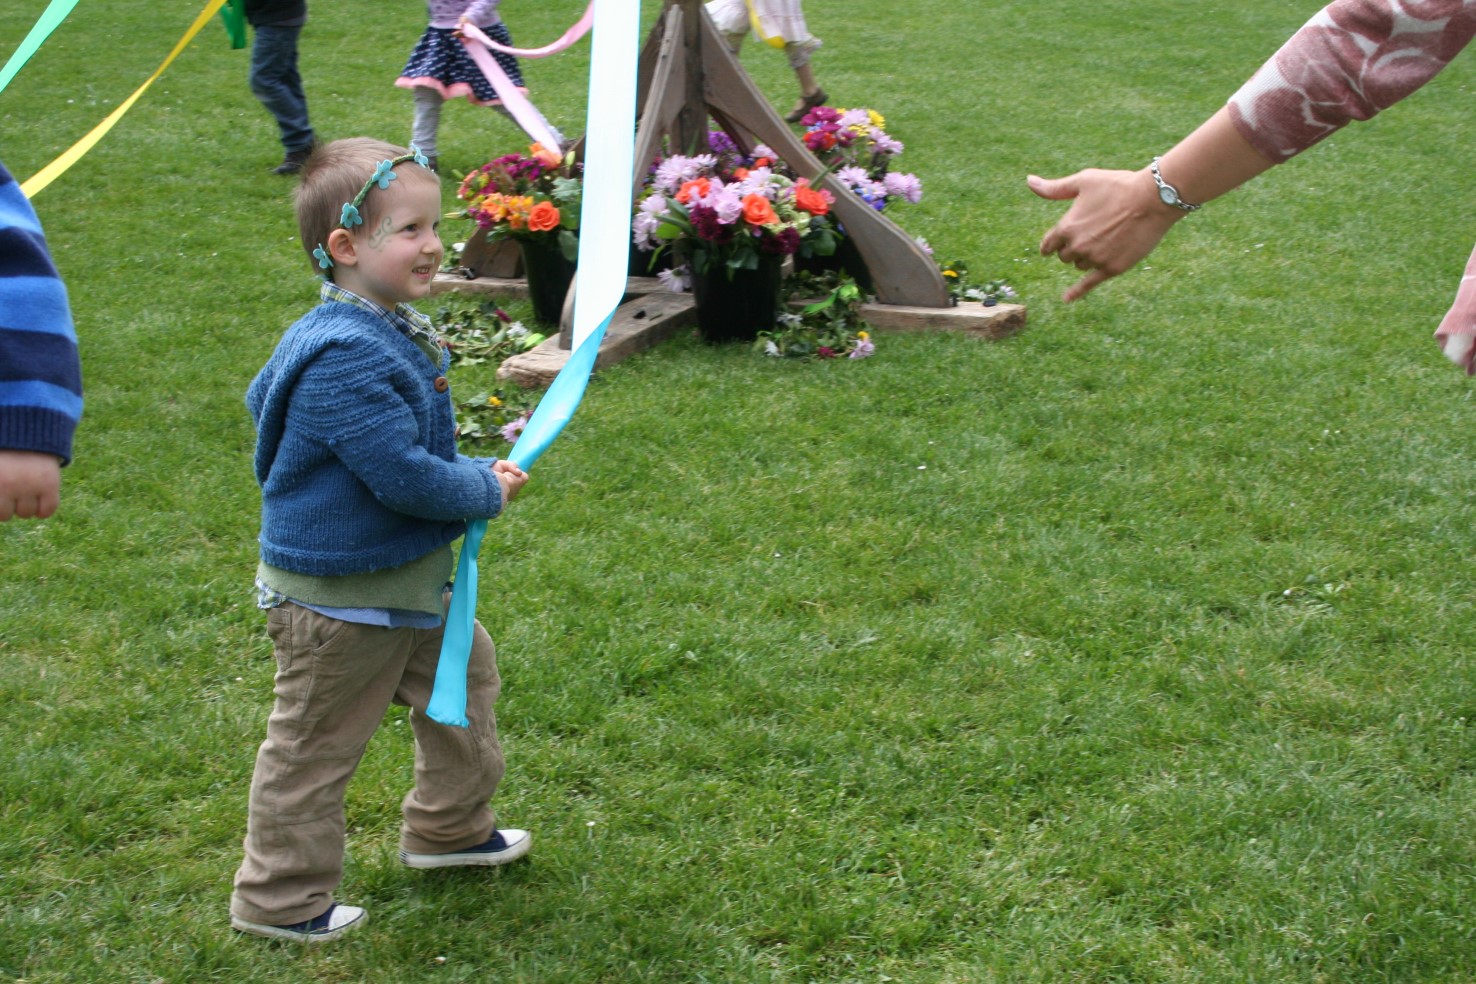
Our whole family wears these flower garlands, Jeff even puts his around his favorite hats. This year we wore them to the May Faire (Bracken had his dream come true and was able to do the maypole for the first time!) and also to the Wildflower & Music Festival. Last year we got many comments on them and once again, this year I was amazed at how many people came up and asked me where we got our flower garlands. So many people. I told them I would be posting an updated tutorial on my blog soon, so here you go. They are so easy to make and I’m happy to be sharing the process with you.
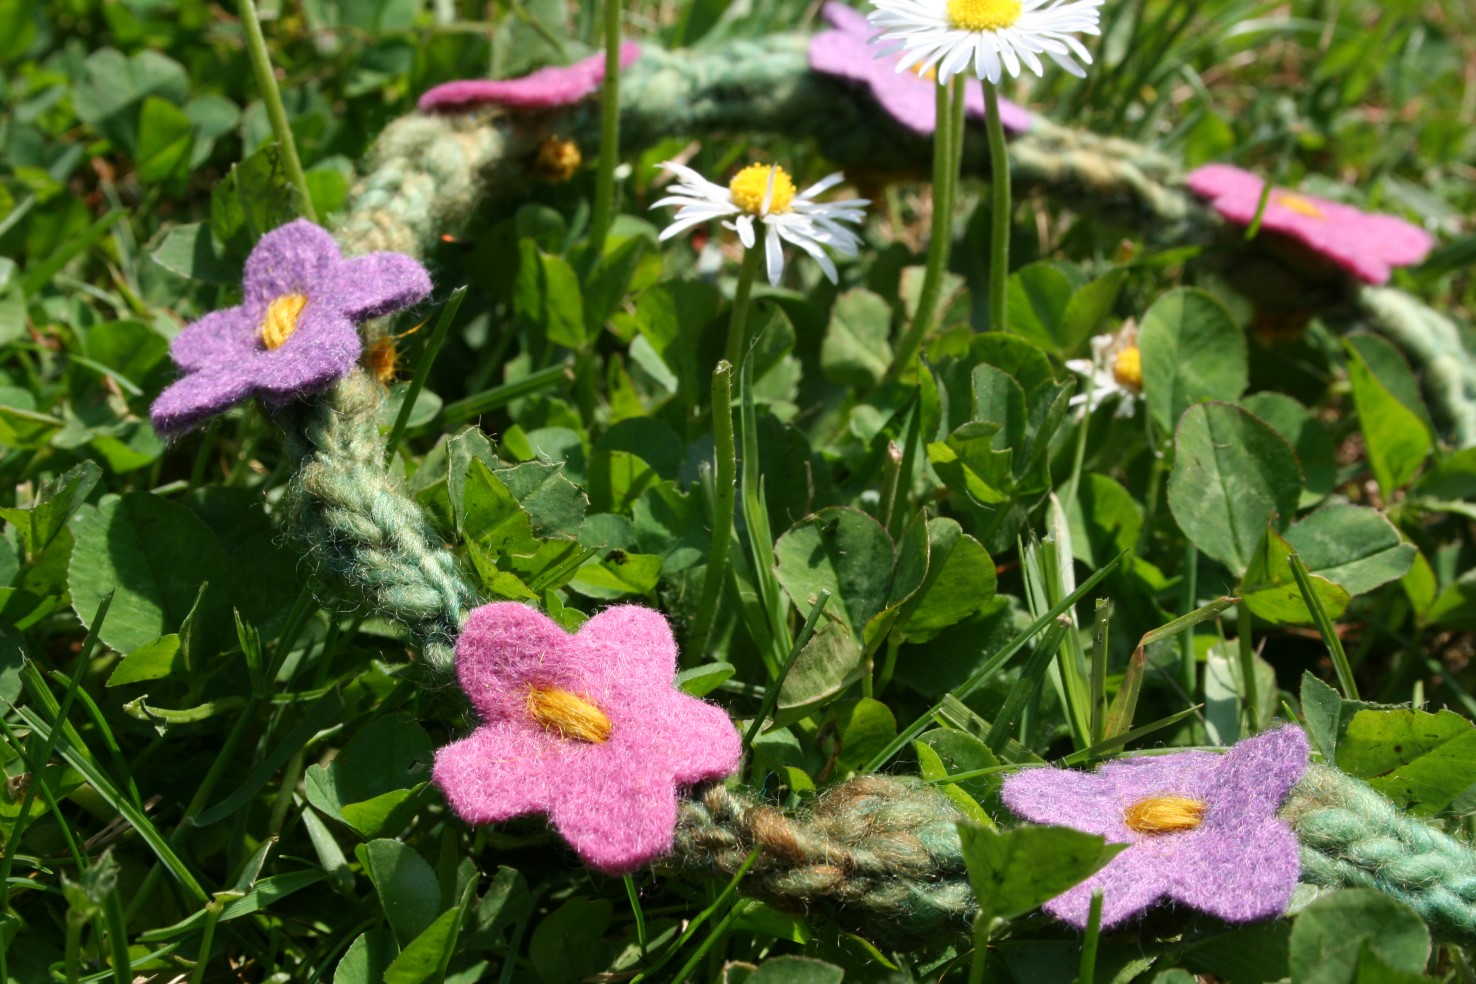
As a side note: something I love about these garlands is that they are soft and very comfortable to wear, making them great for little ones too. They also stretch, making the sizing pretty flexible. They are wonderful for all ages and really do add to the fun of festivals and celebrations. And now, first the making, and then the wearing.
.
.
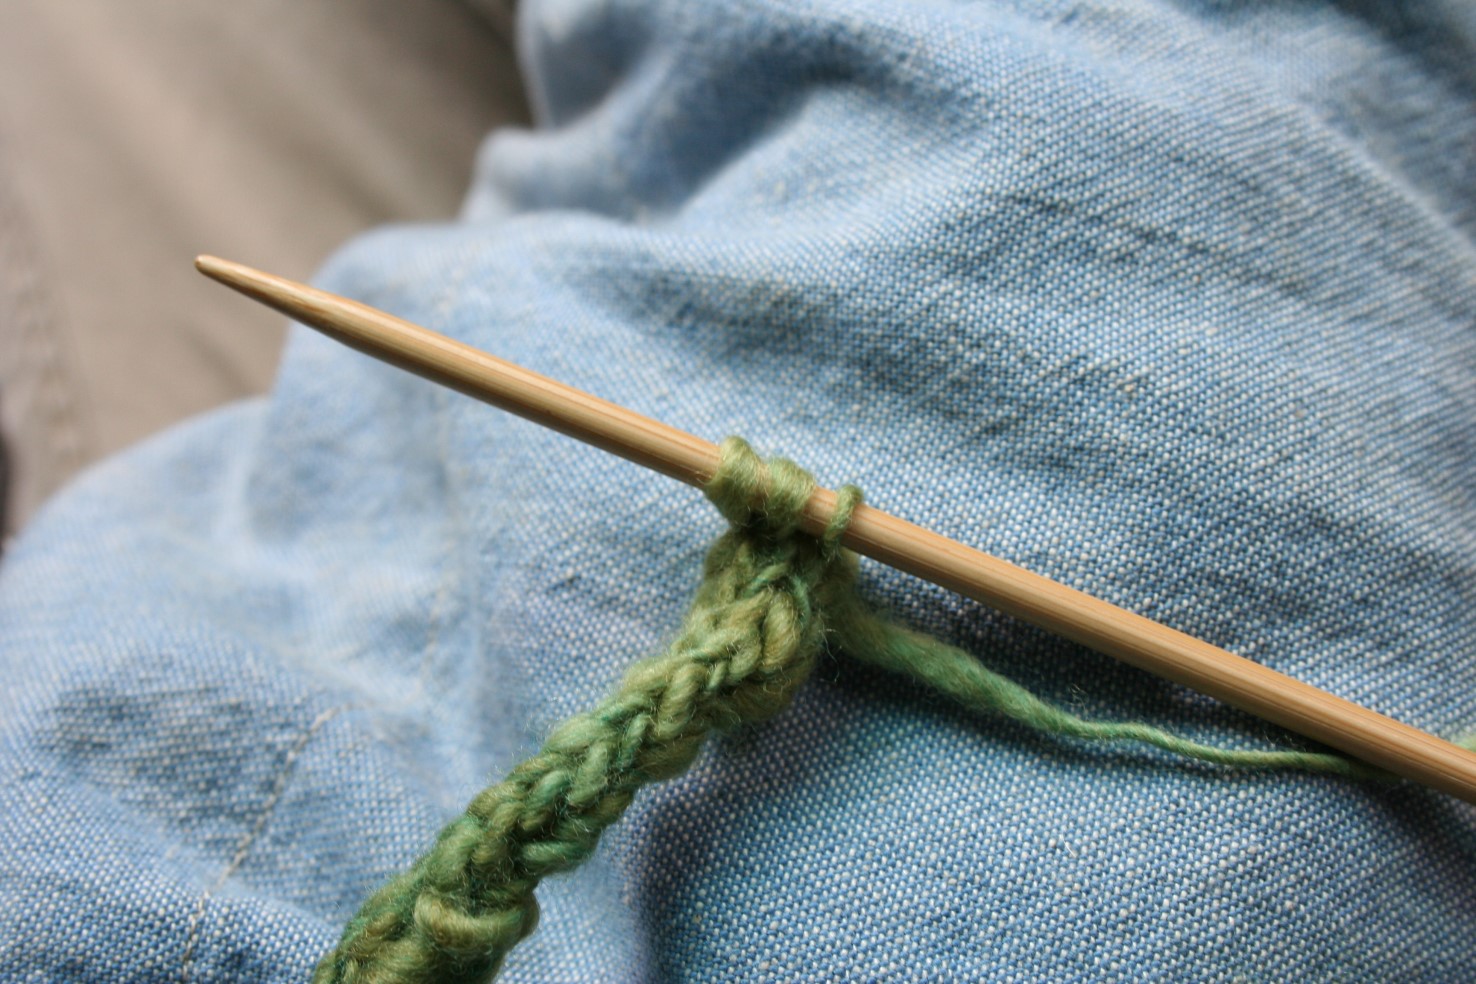
3) Start knitting. To create the base for the garland, I knit a simple i-cord. Cast on three stitches. Knit those three stitches. When you finish knitting, slide those three stitches to the end of your double pointed needle (from the left side of your needle to the right side of your needle, without turning your needles.) Knit the three stitches. Slide to end of knitting needle. Repeat. Easy peasy. (You can find a visual tutorial here.)
.
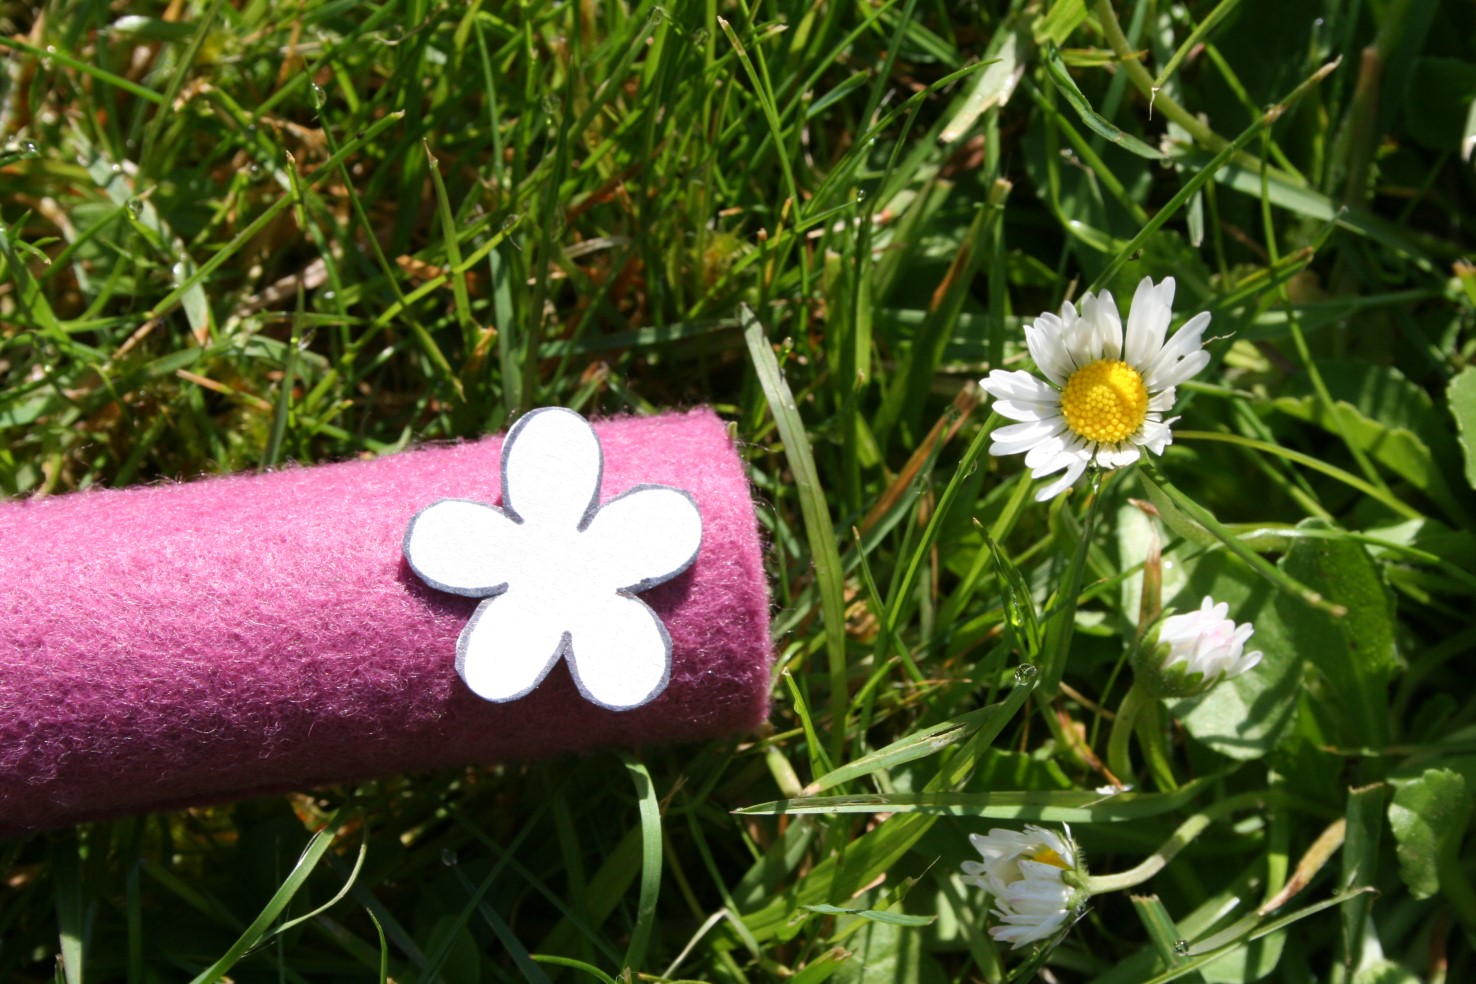
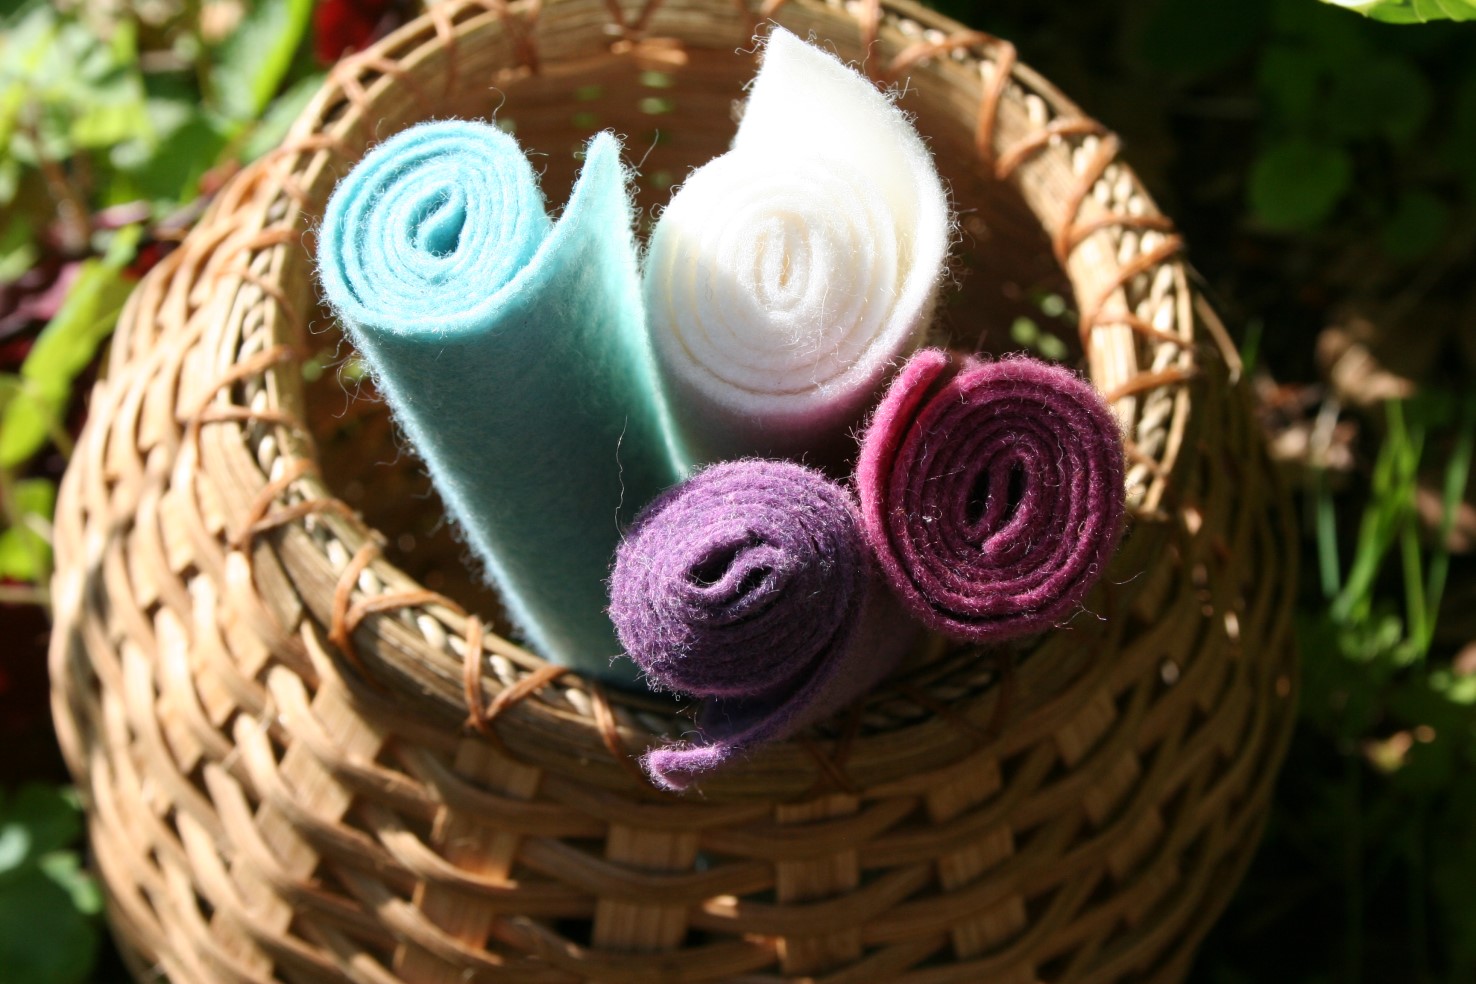
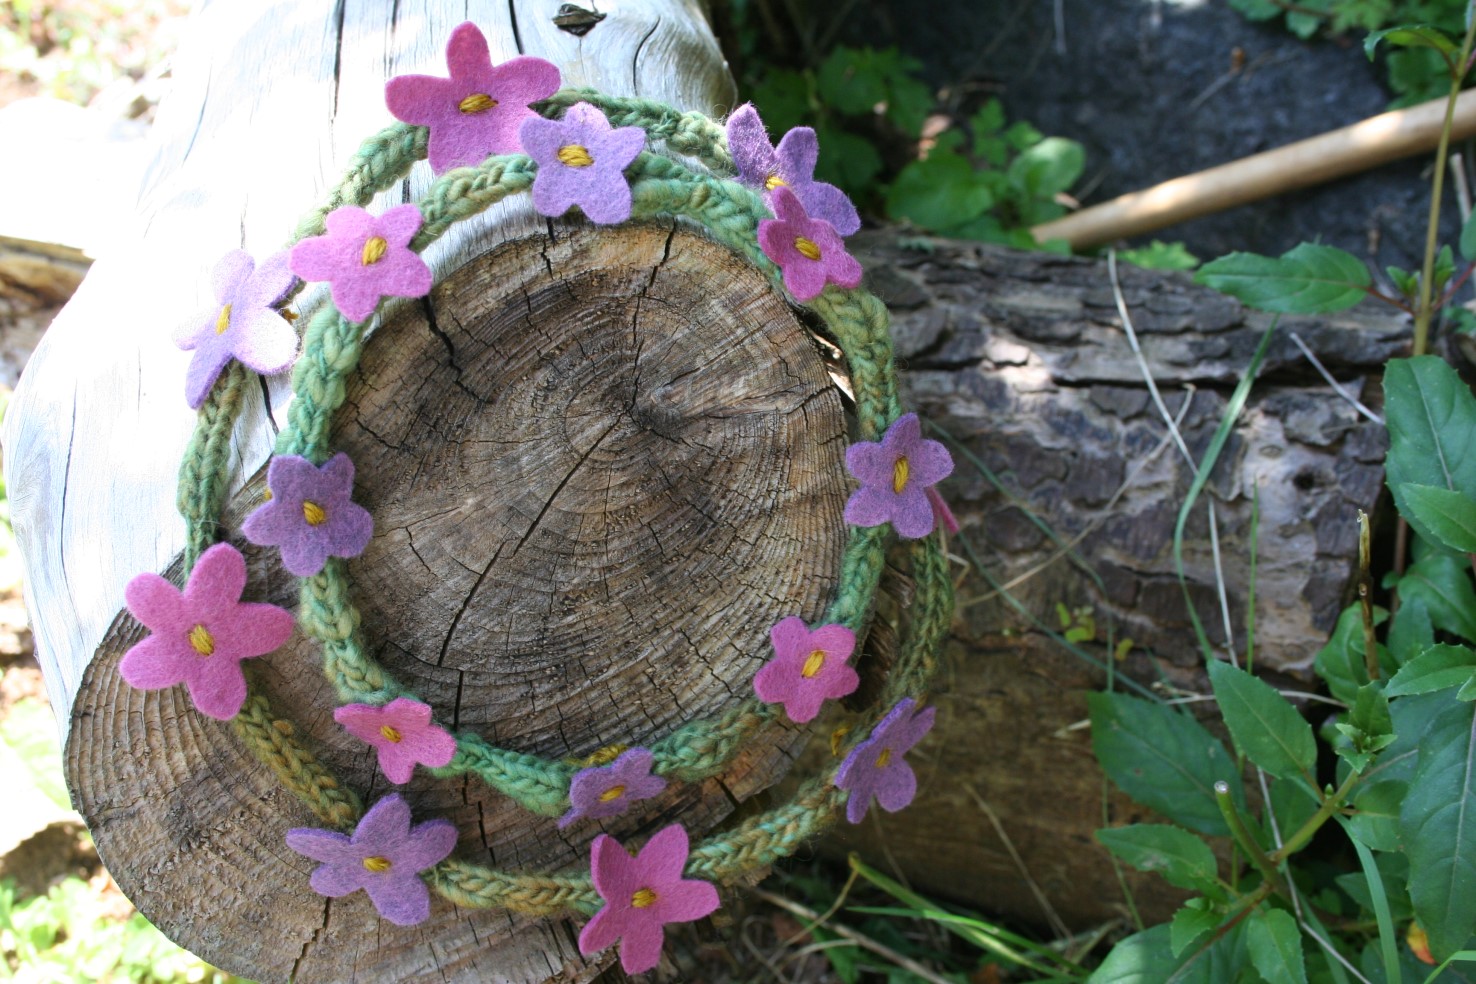
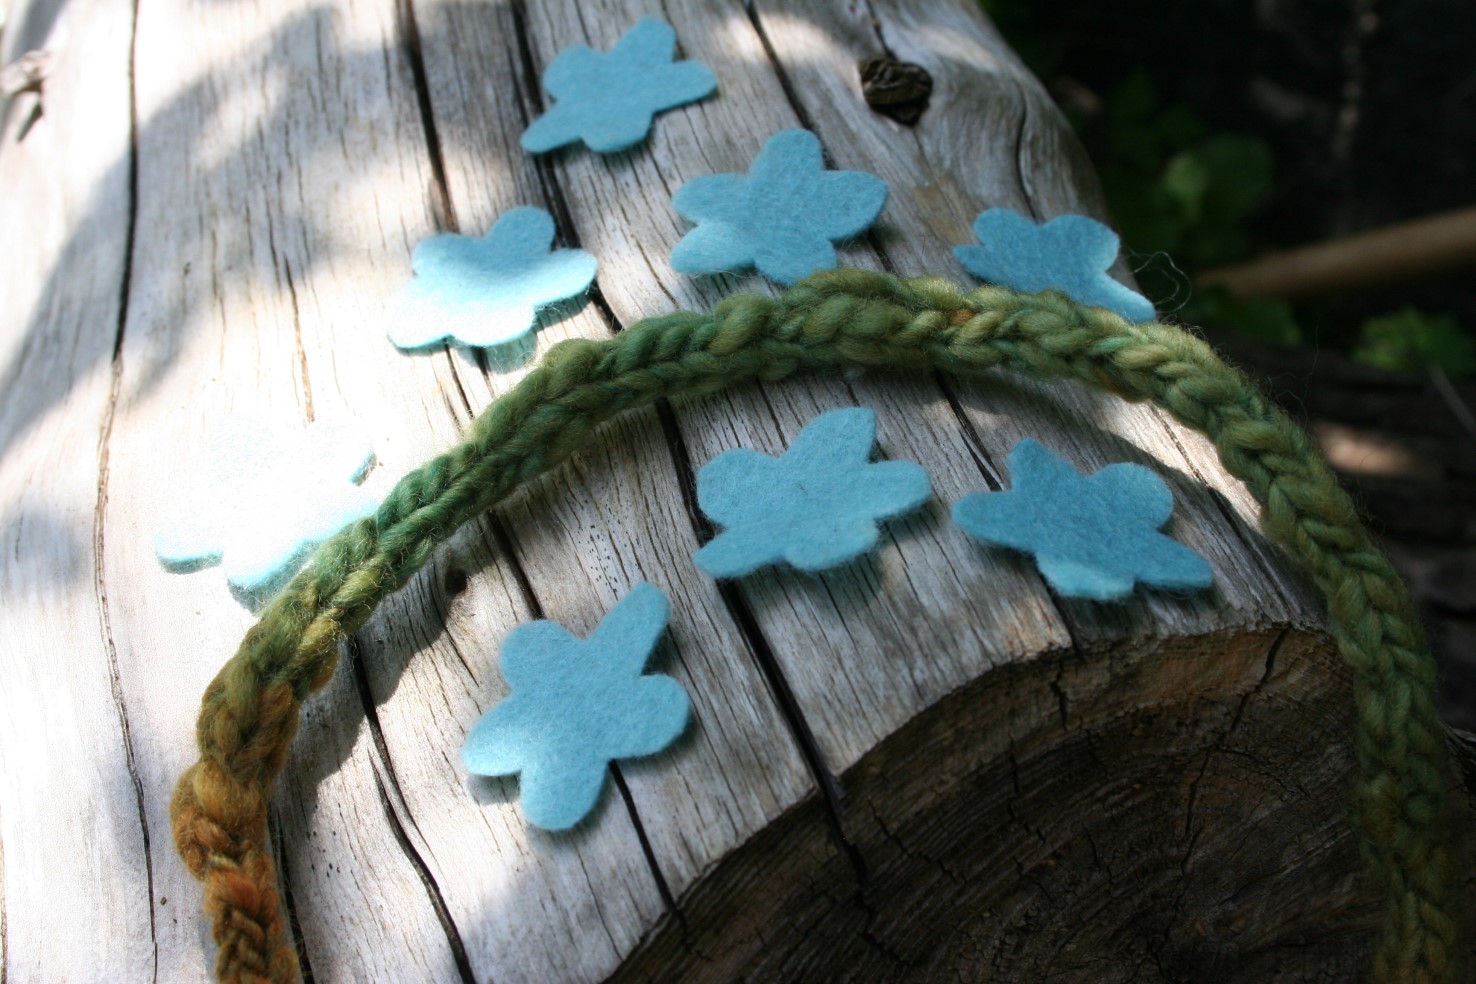 5) Cut your felt flowers. Get your wool felt. The first year I used natural white felt from Felt On The Fly, the second year I used some colored felt from a local sewing shop. I’ve done the cutting out two different ways. The first time I took a blunt pencil and lightly drew my flower shapes, cut them out, and then put the side with the pencil markings to the back, facing the green circle, so the markings wouldn’t show while you wear it. I just drew each flower individually, which was fun in that each one was unique, but a template would have been easier. The second time I drew flowers on a piece of card stock paper until I had one I liked. Then I used that as a template for the rest. Each one still turned out unique, though the shapes were not as defined as when I drew the shapes directly on the felt. The smaller the garland size, the smaller the flowers I make and the larger the garland size, the larger flowers I make. Oh, and you could do all different sorts of flower shapes!
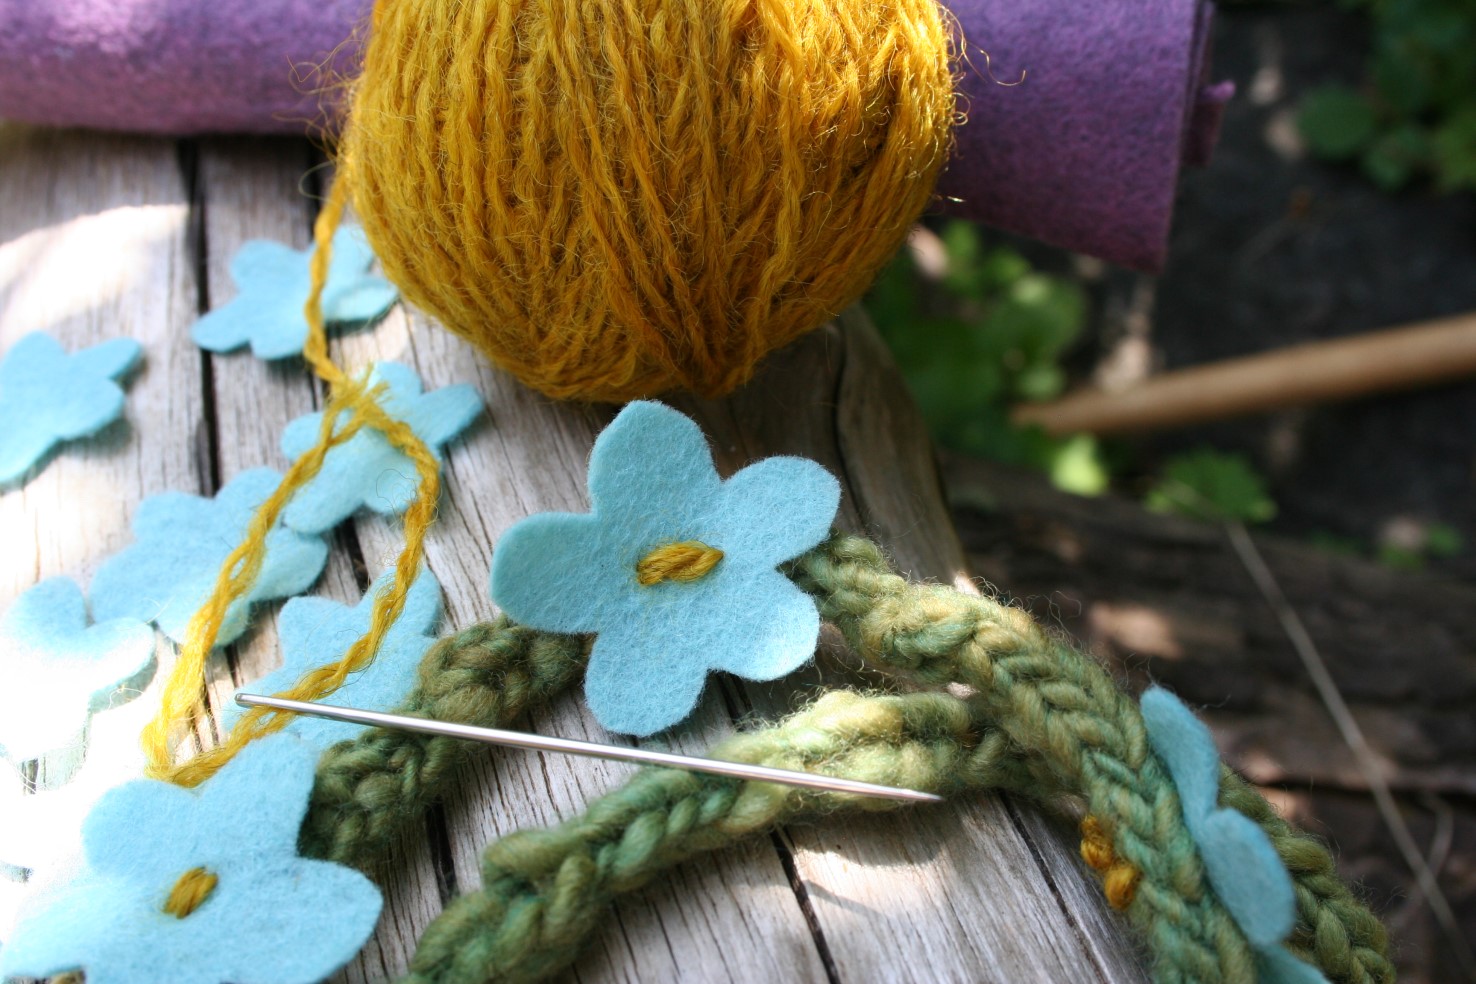
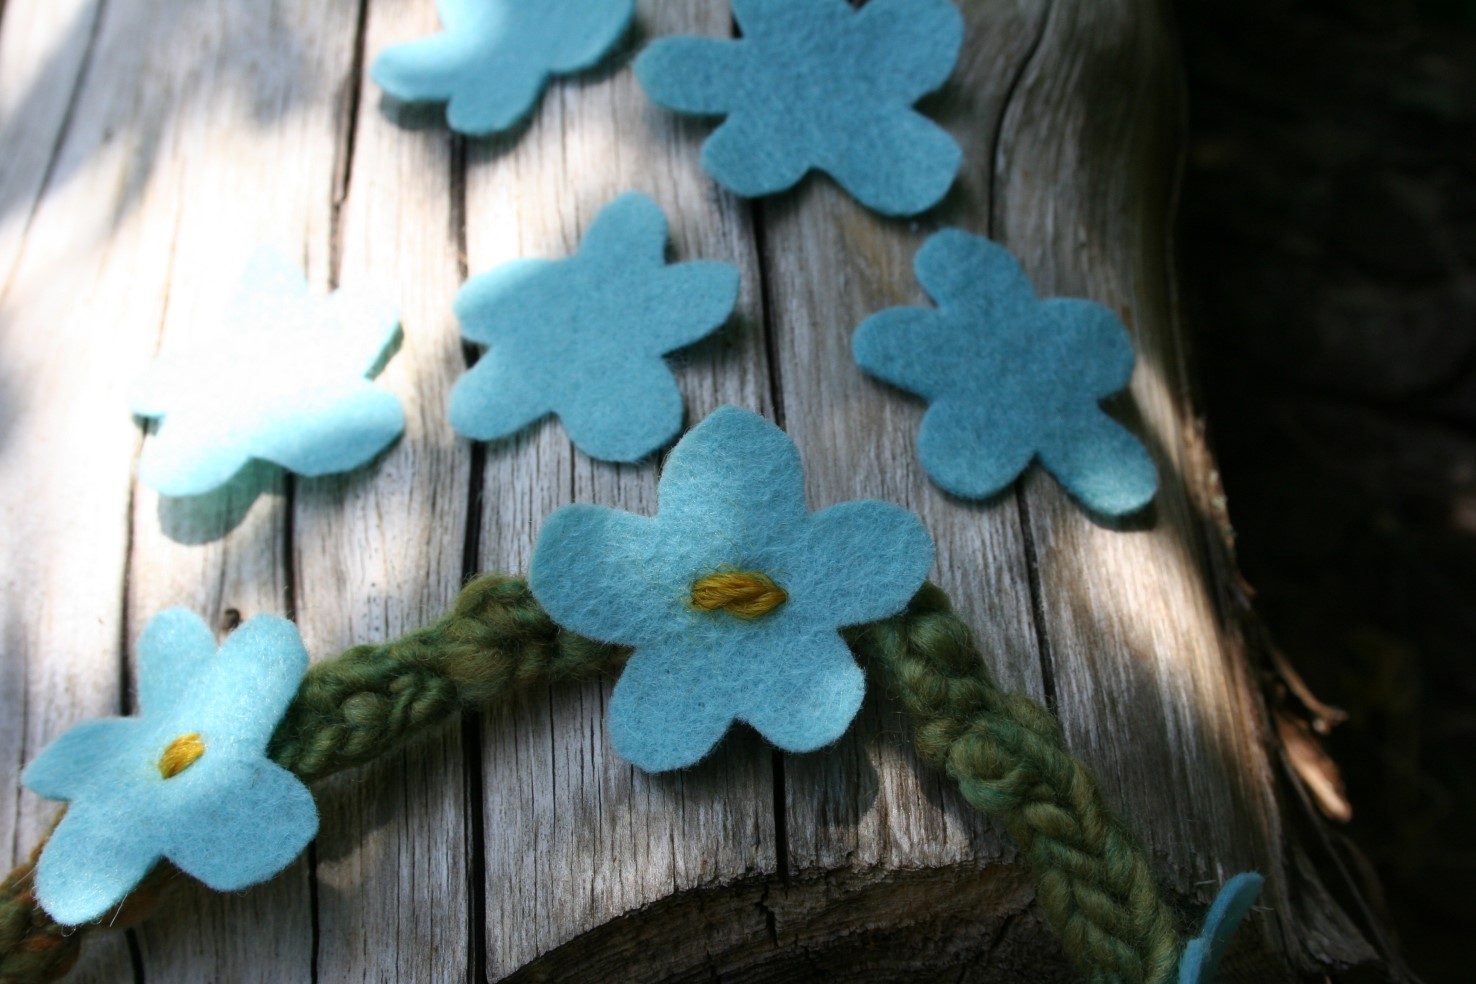 6) Attach your flowers. Place your first flower where you would like it. (I always put the first flower on the point where I connected the ends together, to cover it up.) Sew the flower on with your sewing needle. I used yellow wool yarn to stitch on the flowers. I do two to three stitches across the center, which makes a good, colorful center. (I used some sport weight wool yarn from our friends at Timberwolf Farm, naturally dyed with marigolds, the perfect yellow center for the flowers.) You could just use yellow thread, but the yarn makes a much more noticeable center. I don’t have a good trick for making your knots especially pretty or unnoticeable after stitching on the flowers, but that part won’t show when you’re wearing the garland, since it will be to the inside.
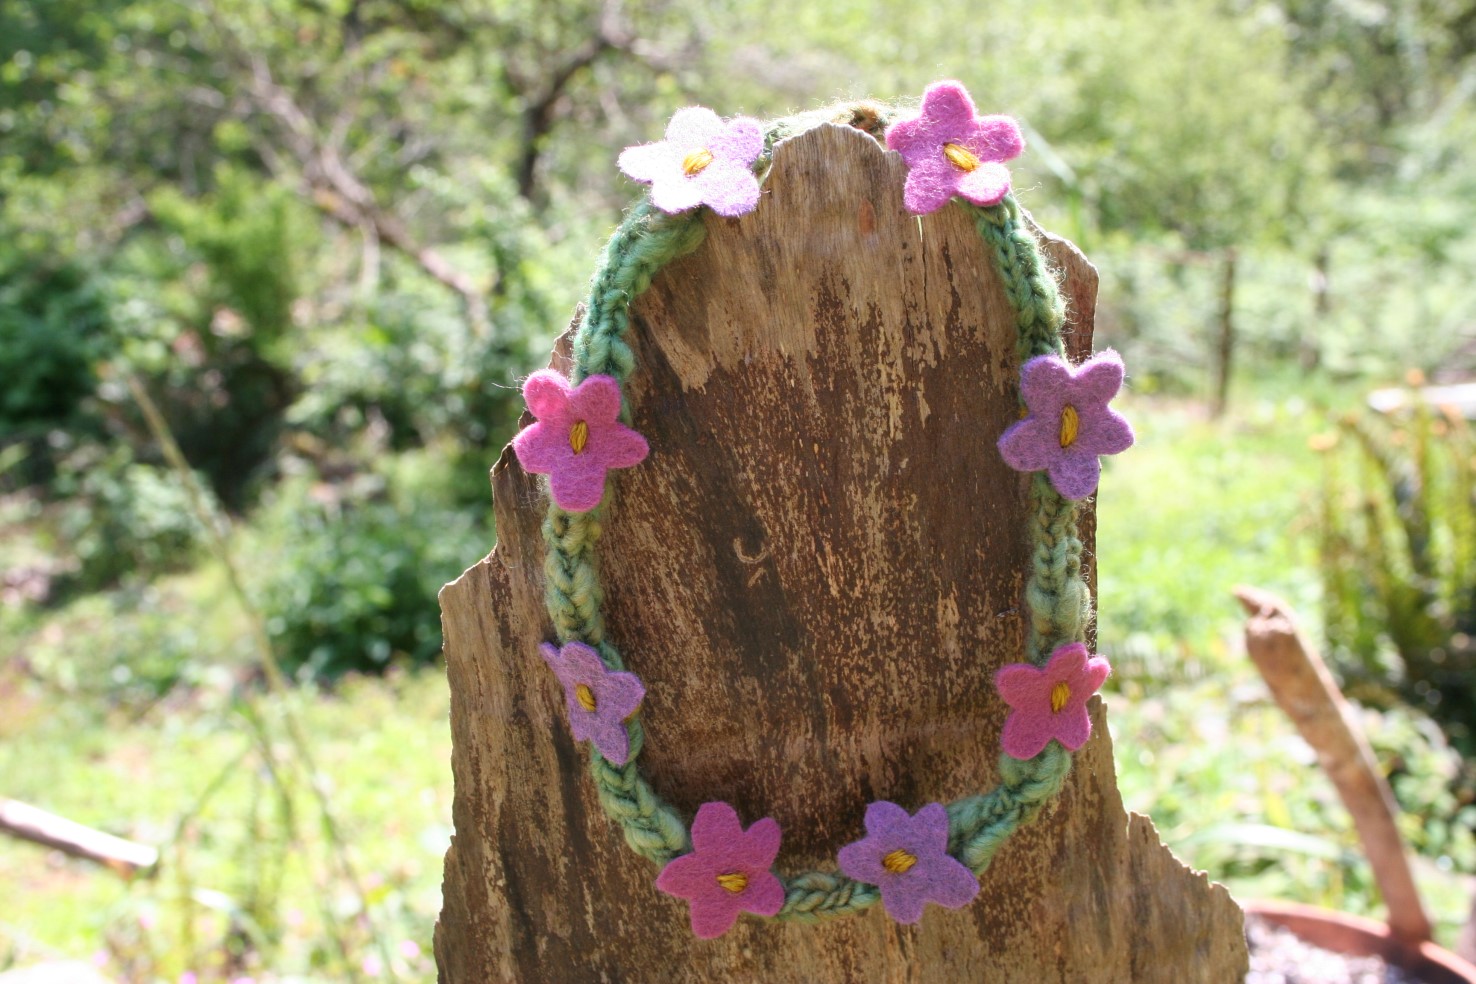
To place the flowers, I do the second flower directly across from the first one. The third and fourth evenly between those, and continue until there are eight flowers on each garland. I like that good amount. But you could go wild with flowers and add more, whatever you prefer.
 7) Wear and enjoy. You might even notice yourself smiling more than usual. It’s fun to be festive. If you have any springtime celebrations, it’s the perfect time to wear them, but simply springtime arriving is celebration enough. The children in your life will especially love them, but everyone will enjoy a touch of flowery fun…

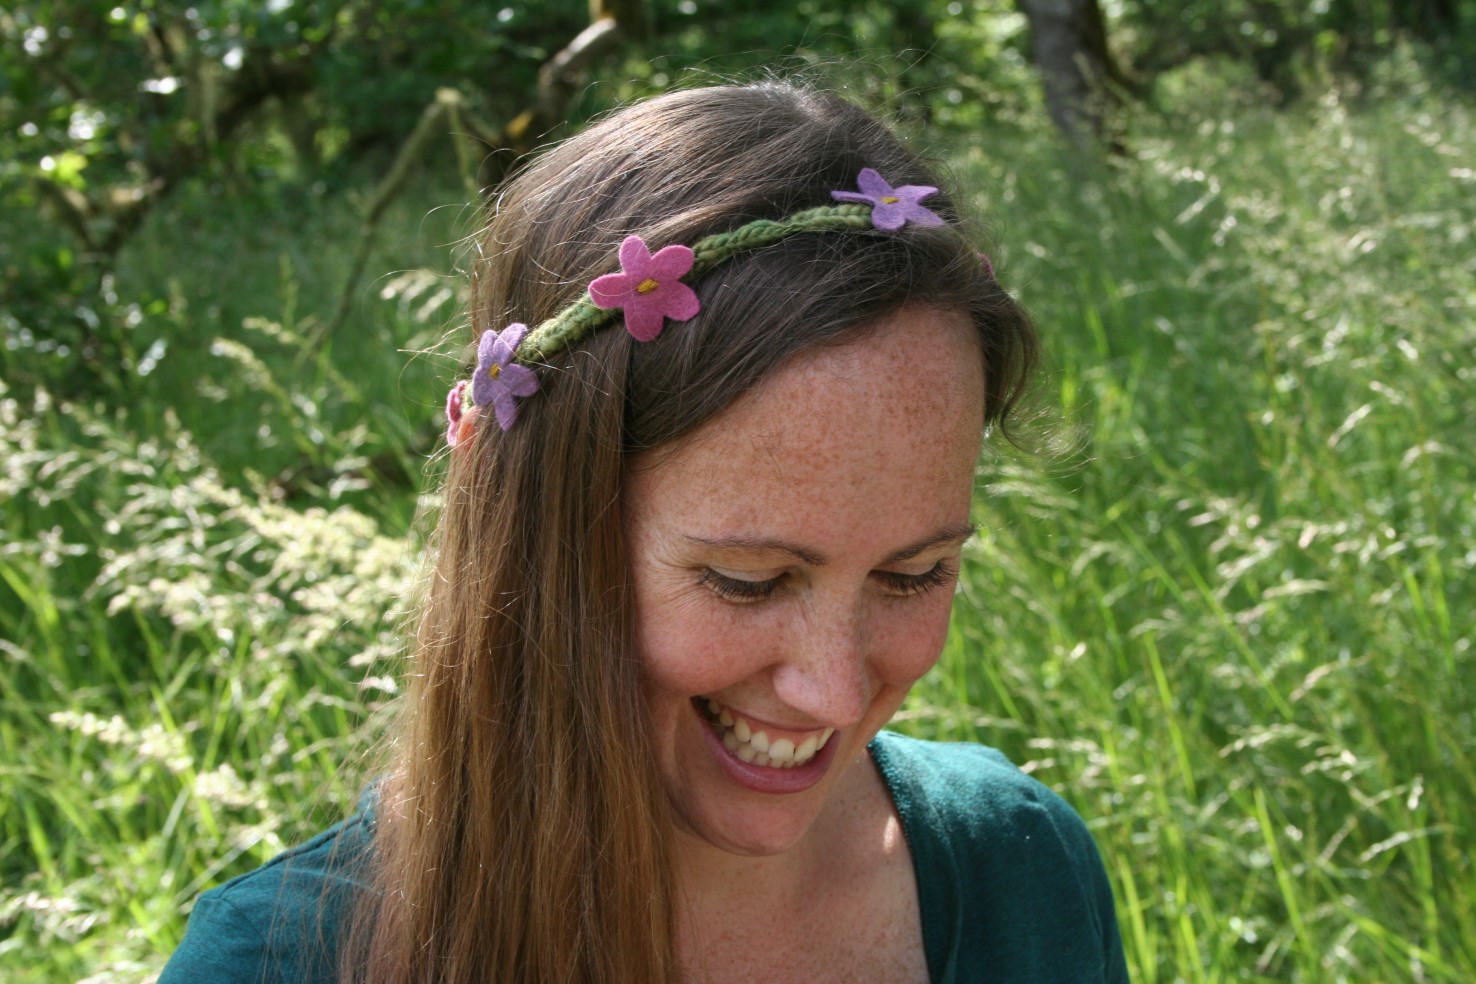
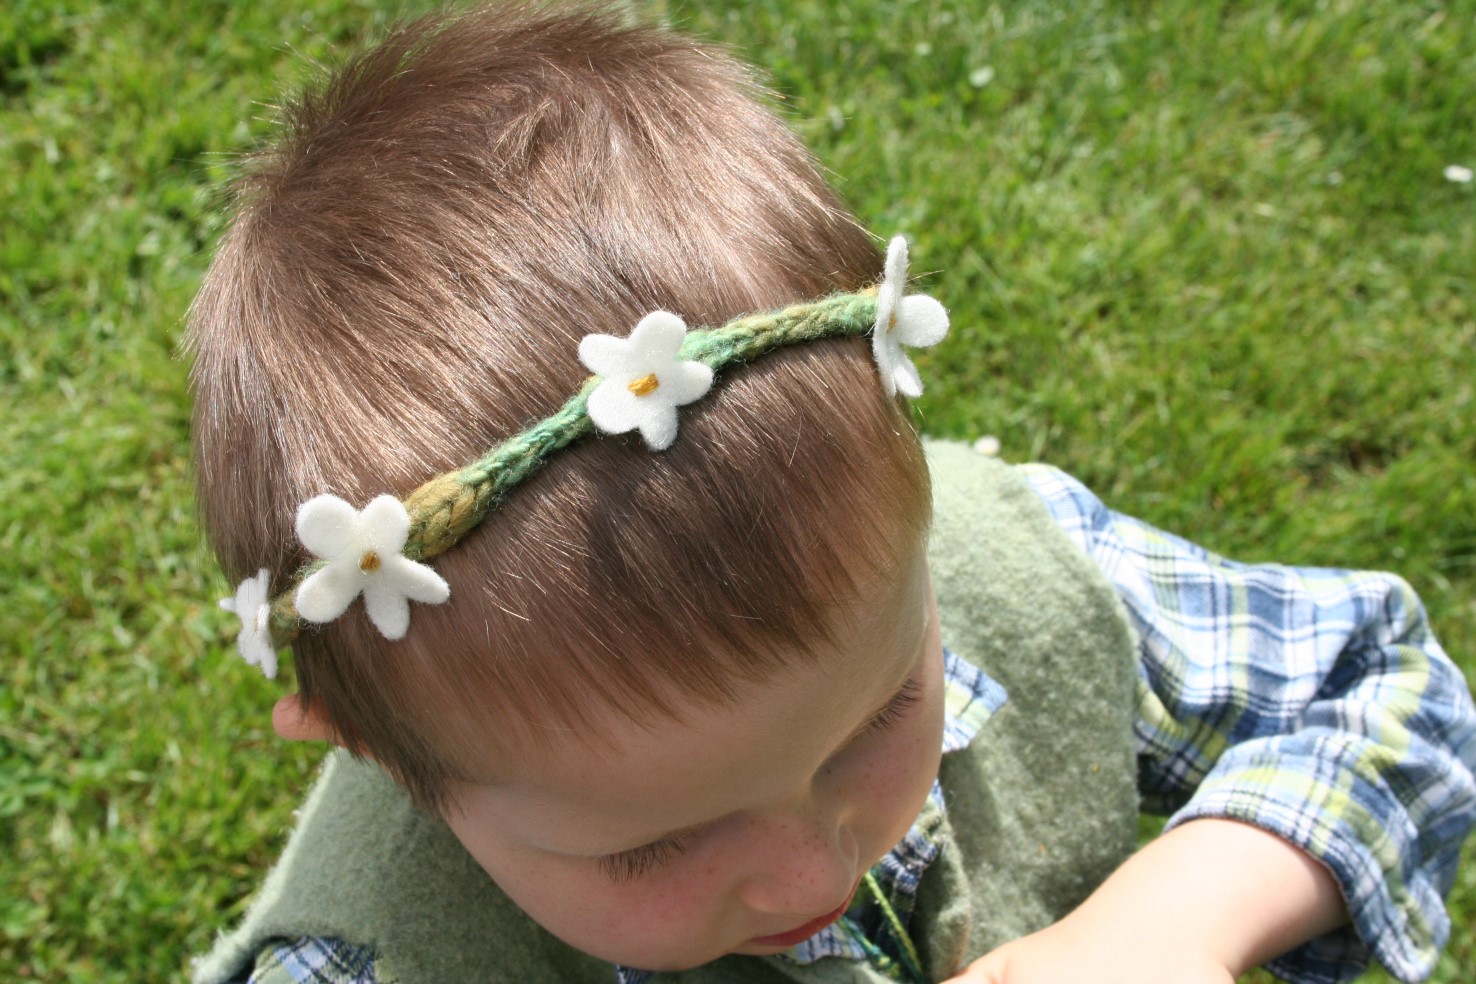
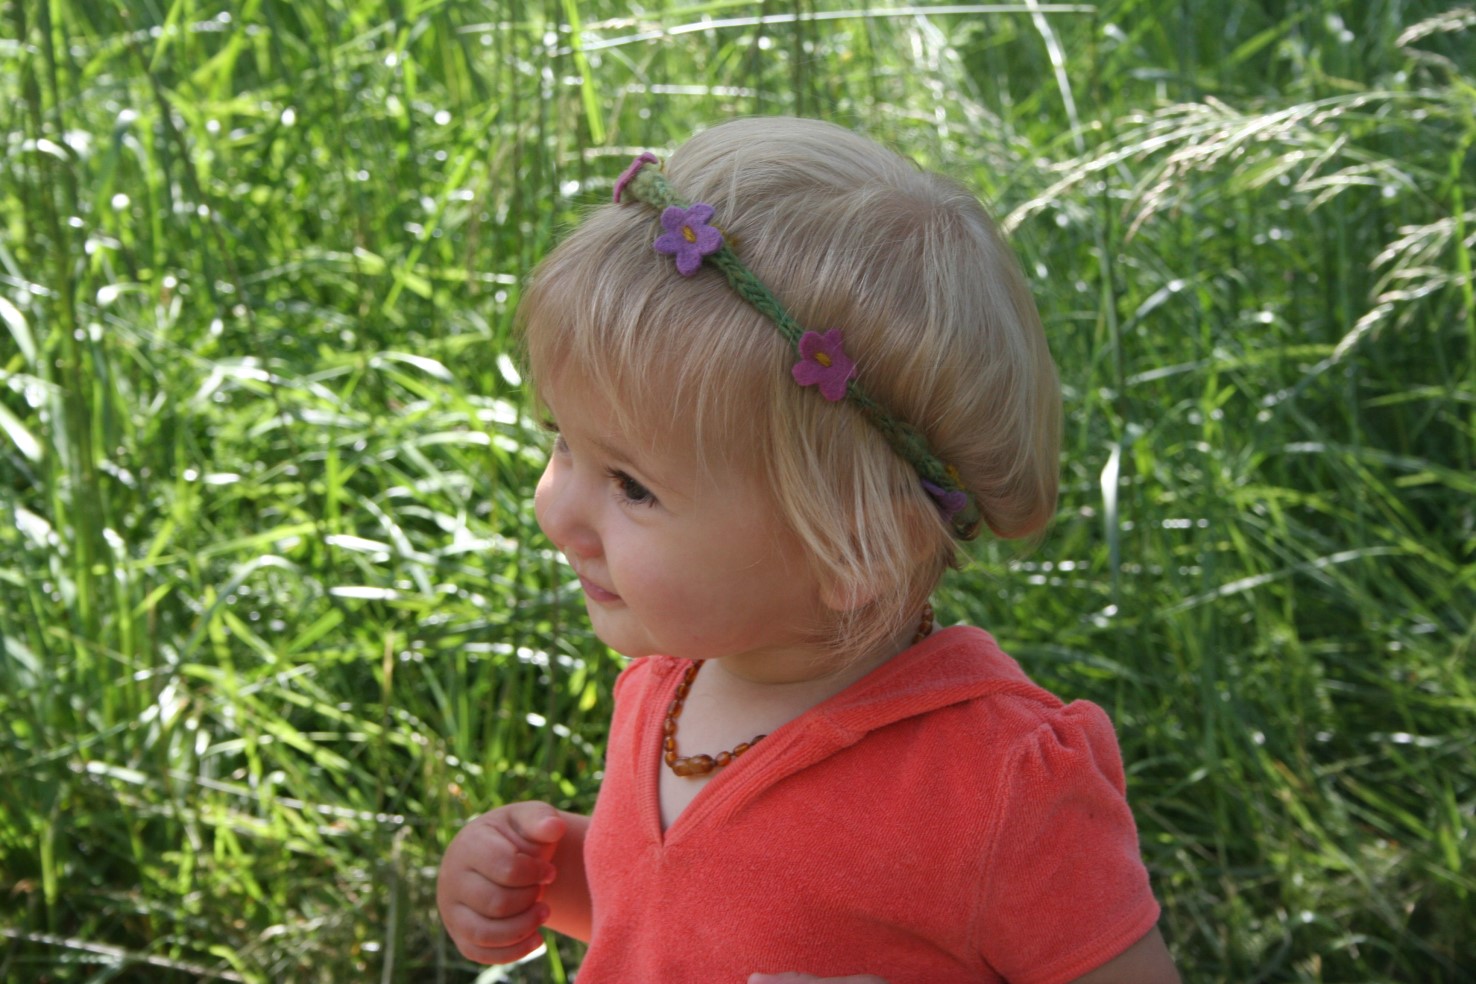
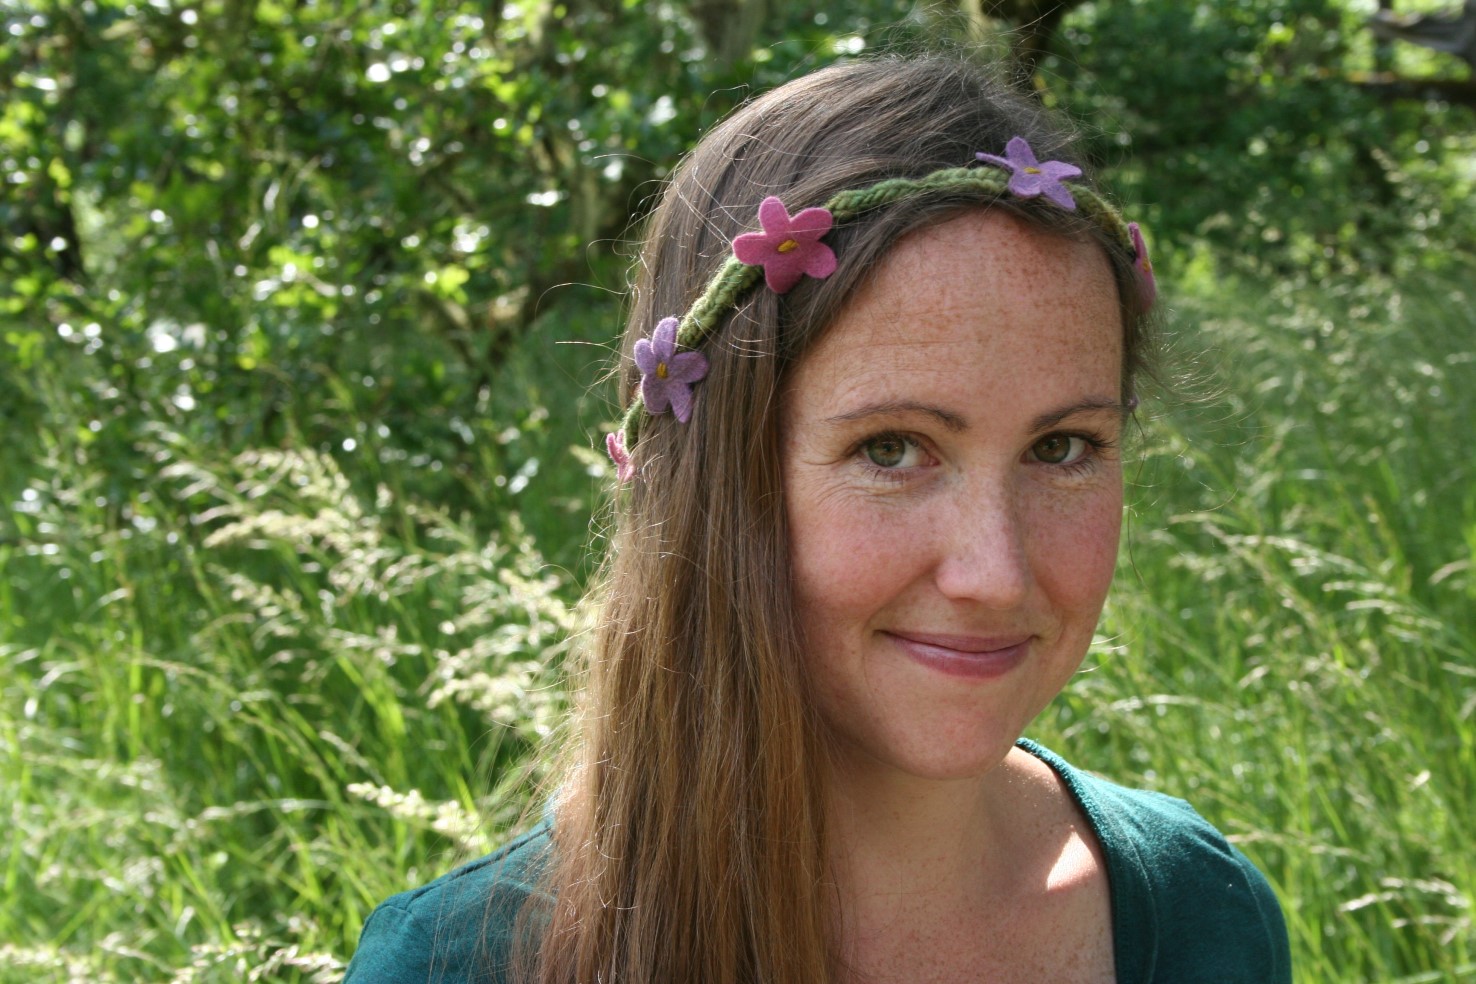
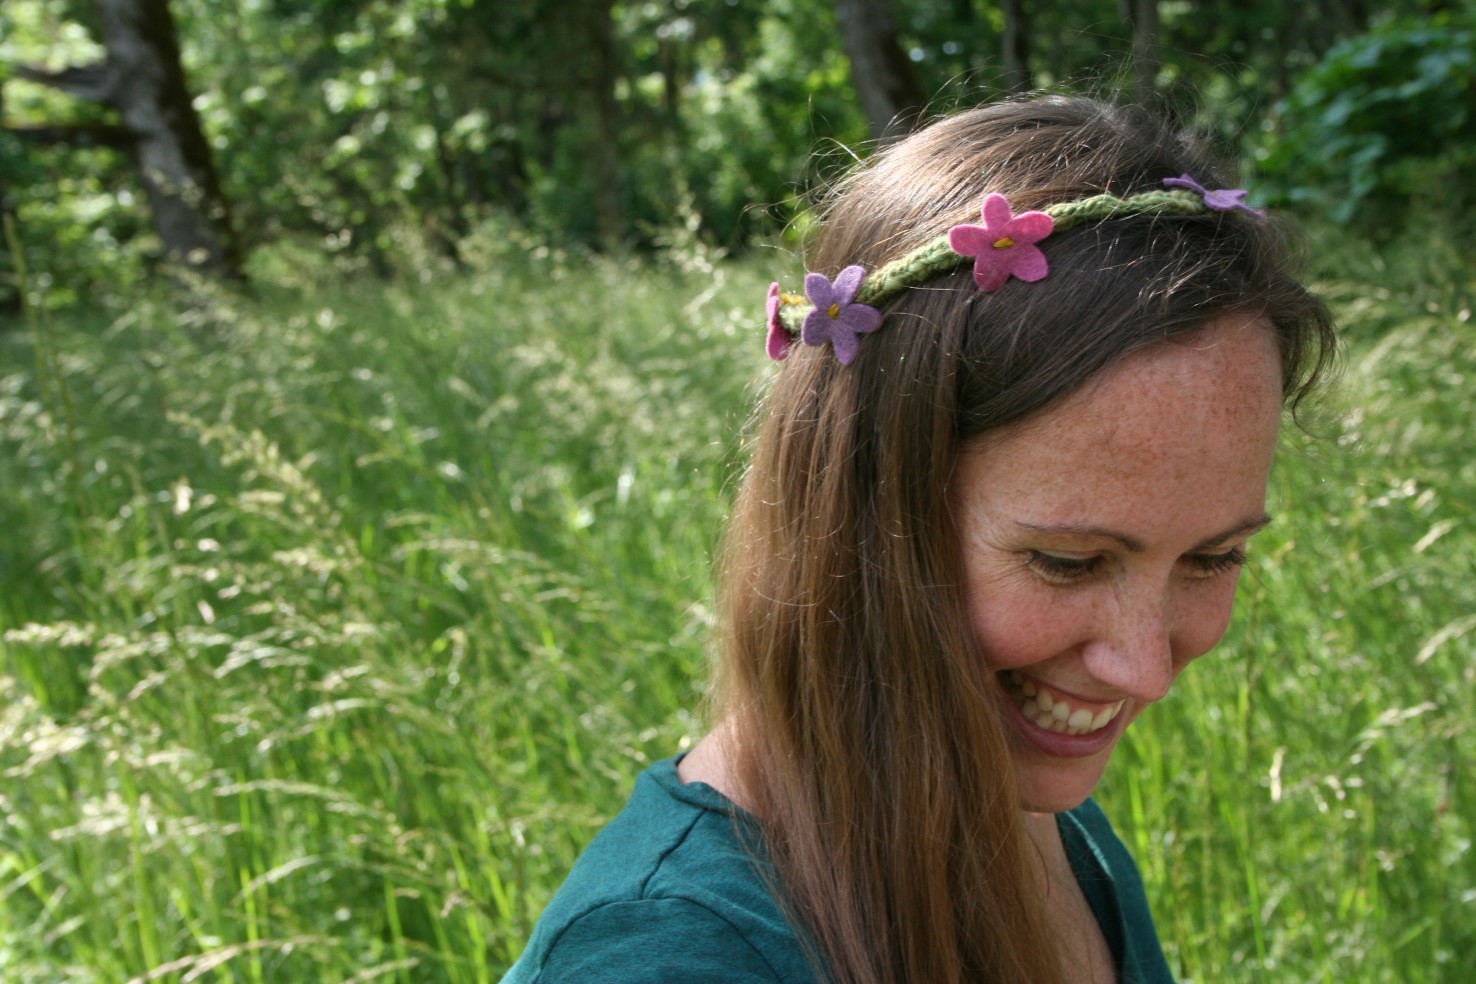 {A big thank you to Bracken and our dear friends, Erica and Isis, for being my flower garland models!}
P.S. The pattern can be found here on Ravelry. If you make them and you are on Ravelry, please share your projects there, I would be so delighted to see your garlands!
P.P.S. If you have any questions while creating your garland, feel free to leave a comment here or message me on Ravelry.
You all look beautiful, Taryn. I can’t wait to try it! Thanks for sharing the pattern! 🙂
Your friend looks like your sister!
Thanks for tutorial, they are great. Your youngest looks adorable in hers!
Thank you! (And that sweet girl is my friend’s little one. She’s a love.)